
HOW TO START A PHOTO GALLERY WALL
How to start a family photo wall (without the overwhelm)
There’s something so special about walking past a wall in your home and seeing your family’s story told through beautiful images. A gallery wall is more than just decor, it’s a daily reminder of love, connection, and all the little moments that matter (plus your kids will absolutely love seeing their faces up on the wall).
But starting a gallery wall can feel a bit daunting, especially if you’re not sure where to begin. Do the frames have to match? How many photos should you include? Where should it go?
Here’s a simple, step-by-step guide to help you get started with ease.
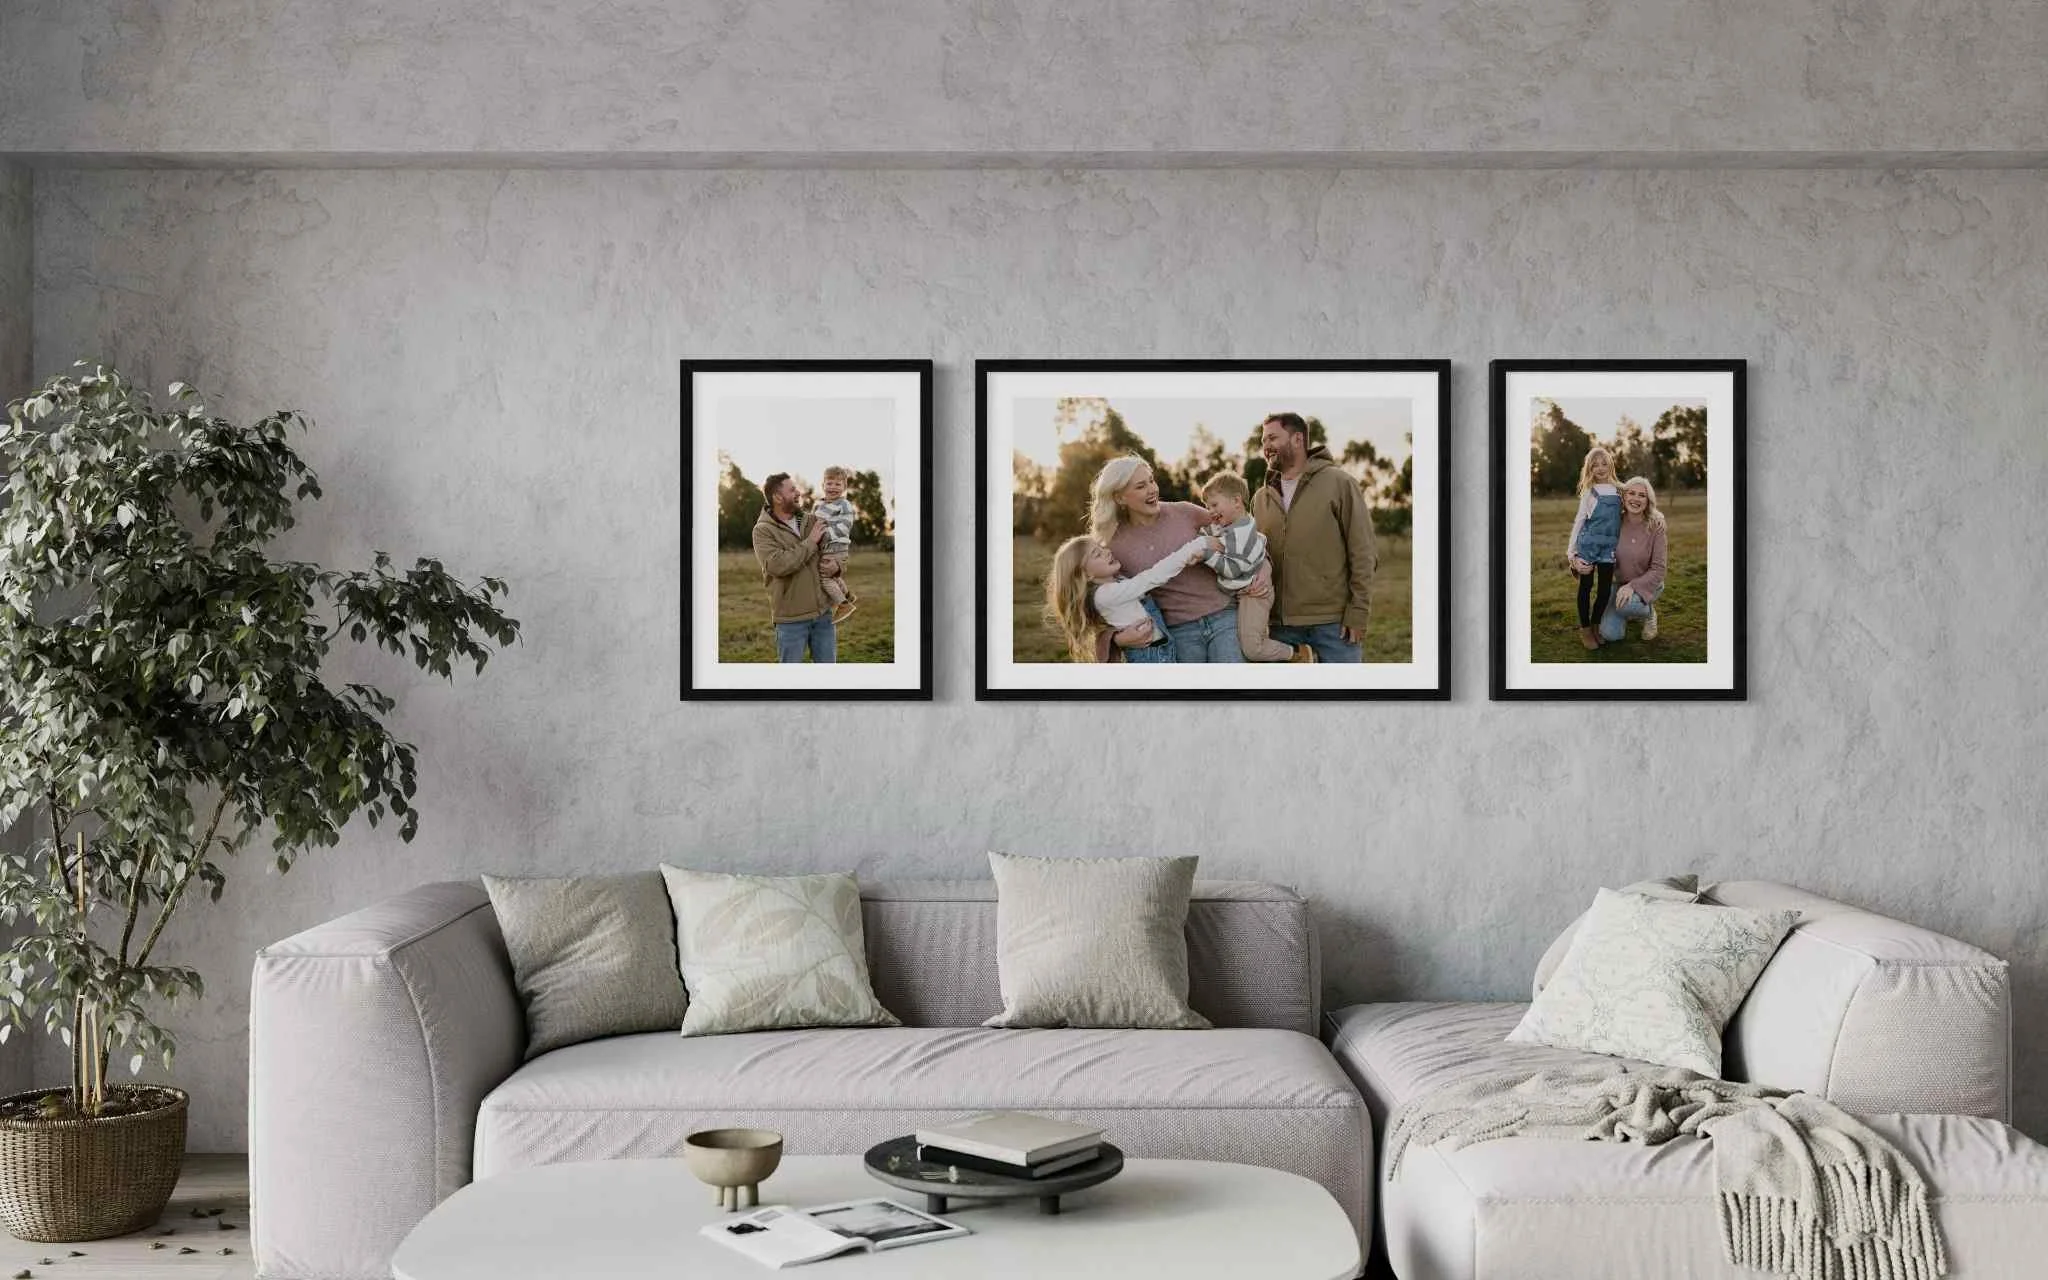
1. Choose the Right Wall
Before you even think about frames or photos, take a moment to walk through your home and notice the spaces where a gallery wall might naturally belong. Some of my favourite spots include:
Above the sofa
Along a hallway
In the dining room or kitchen
Up the stairs
In a child’s bedroom or playroom
The best place is somewhere you’ll walk past often. A gallery wall is meant to be enjoyed - not tucked away! You don’t need a huge space either; even a narrow wall can be the perfect home for a smaller curated collection.
2. Pick Your Anchor Piece
Start with one standout photo. This could be a large family portrait, a quiet newborn moment, or a playful candid shot from your recent session. Think of this image as the foundation, the one that sets the tone for your gallery wall.
From here, you can build out with smaller prints, adding visual interest and variety while still keeping a sense of balance.
3. Build Around It Slowly
You don’t have to create a full wall all at once. In fact, some of the most meaningful gallery walls grow over time.
Start with 2–3 pieces that work well together, and add more as your family grows or new memories are made. Include milestones, favourite places, or even special pieces of your children’s artwork.
This approach keeps the process from feeling overwhelming and gives you room to evolve your space naturally.
4. Keep Consistency in Mind
Your gallery wall doesn’t need to be perfectly matched, but a few unifying elements will help everything feel cohesive.
You might choose:
The same frame colour or material
A consistent print style (e.g. all black and white, or all warm tones)
A shared mood or storytelling thread
My editing style, for example, is soft, timeless, and natural, designed to sit beautifully in your home for years to come without ever feeling dated.
5. Plan Your Layout First
Before hammering any nails into the wall, play with the layout. You can cut paper templates the same size as your frames and tape them to the wall or lay everything out on the floor to test different arrangements.
This step is well worth the time as it helps you see how everything flows together and avoids any regrets later.
6. Let Me Help
If this still feels like a lot to figure out, don’t worry - you’re not alone! I offer custom wall gallery designs as part of your photography experience. We’ll take your favourite images from our session and I’ll create a visual mock-up showing exactly how they’ll look in your chosen space.
From selecting the right sizes to choosing frame options, I’ll guide you through it all so you can feel confident and excited about bringing your gallery wall to life.
You don’t need to be an interior designer to create something beautiful. You just need meaningful images, a little guidance, and a wall that deserves to be loved.
If you’re ready to start your gallery wall or want help planning one with your latest session images, I’d love to chat.
Let’s bring your memories off the screen and into your home where they belong!